

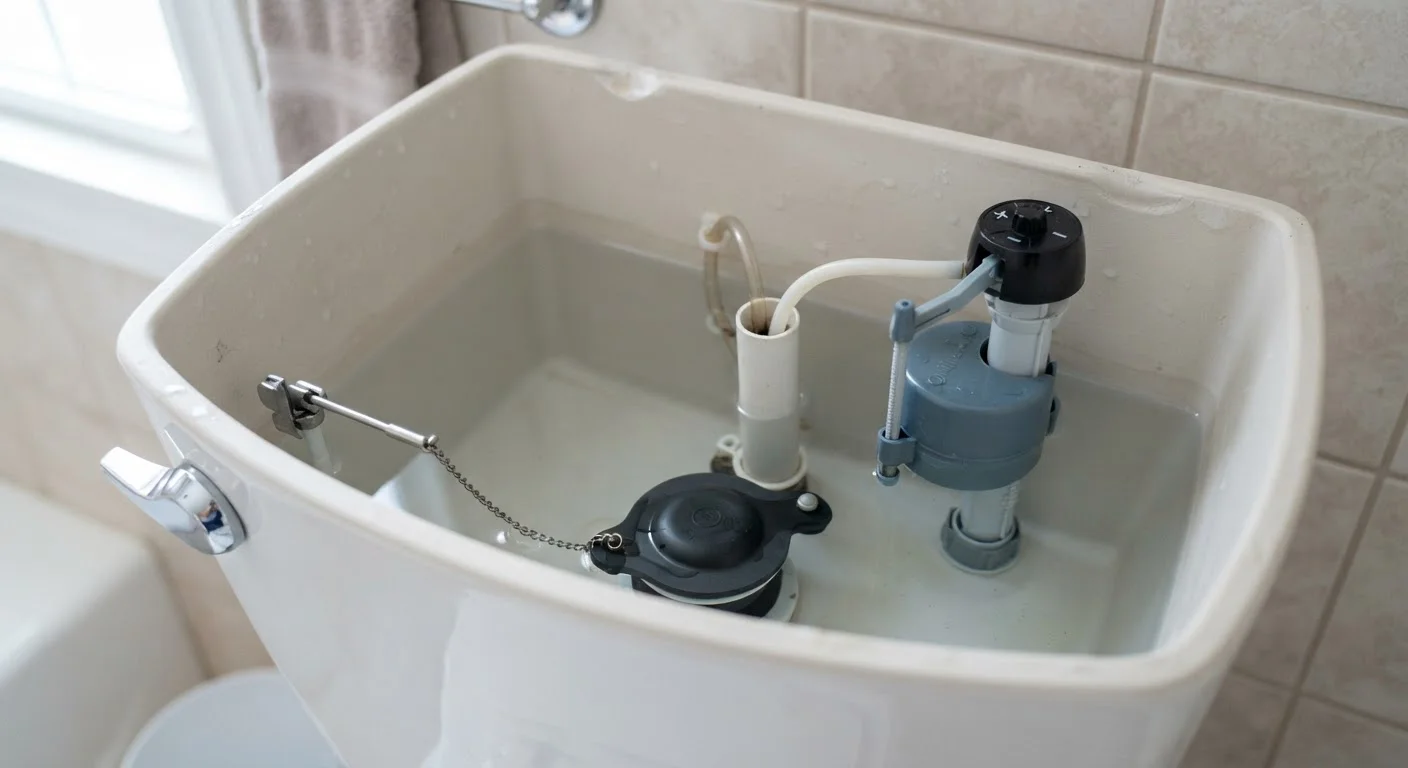
Why Your Toilet Keeps Running
The continuous sound of running water after a flush is one of the most common household plumbing complaints - and one of the most fixable. Nearly every case traces back to the same three suspects inside the tank: a leaking flapper, a malfunctioning fill valve, or an incorrectly set float. Understanding how these parts interact makes the diagnosis straightforward.
After you flush, the flapper lifts to release tank water into the bowl, then drops back down to seal the opening. As the tank refills, the float rises with the water level until it signals the fill valve to shut off. If any link in this chain breaks down, water either leaks past the flapper or overfills and drains continuously through the overflow tube.
Don't Ignore a Running Toilet
A toilet that runs continuously can waste 200 gallons of water or more per day, significantly inflating your water bill. Beyond cost, persistent water movement can erode internal rubber parts faster, turning a simple fix into a more involved repair if left unaddressed.
The good news: toilet tank parts are designed to be replaced by homeowners. No soldering, no complex plumbing knowledge, and no specialized tools are required for the vast majority of repairs.
What you will need
Tools and Parts You'll Need
Before opening the tank, gather a few basics. Most repairs require nothing more than what's listed below - and many homeowners already have the essentials on hand.
Adjustable wrench
Loosens and tightens the lock nut securing the fill valve to the tank bottom.
Replacement flapper
Seals the flush valve seat; replaces the worn or warped flapper causing tank water to leak into the bowl.
Universal fill valve
Replaces a faulty fill valve that causes the toilet to run continuously after flushing.
Sponge and bucket
Removes residual water from the tank after shutting off supply and flushing.
Food coloring
Used in a dye test to confirm whether the flapper is leaking water into the bowl.
When shopping for a replacement flapper, look for the model number on the inside of your tank lid or the side of the flush valve. If you cannot find it, bring the old flapper along - matching by shape and size is the most reliable method.
Step-by-Step: Diagnosing and Fixing the Problem
Work through the steps below in order. Most repairs are resolved at Step 3 (flapper replacement) or Step 4 (float adjustment), so you may not need to go further.
Turn Off the Water Supply First
Before removing any tank components, locate the shut-off valve on the wall behind or beside the toilet base and turn it clockwise until it stops. Failing to do this can result in water spraying uncontrollably. Once shut off, flush once to empty the tank before you begin work.
Remove the tank lid and observe the components
Lift the porcelain tank lid and set it safely aside on a flat surface - it is heavy and brittle. Look inside and identify the three main parts: the flapper (rubber seal at the tank bottom), the fill valve (tall unit connected to the water supply line), and the float (a ball or cup that rises with the water level). Watch what happens after a flush to spot abnormal behavior.
Perform the dye test to check the flapper
Add several drops of food coloring to the tank water. Do not flush. Wait 10-15 minutes and check the toilet bowl. If the colored water has seeped into the bowl, the flapper is not sealing properly and is the likely culprit. A worn, warped, or mineral-coated flapper is the most common cause of a running toilet.
Replace the flapper
Turn off the shut-off valve and flush to empty the tank. Unhook the flapper's rubber ears from the pegs on the overflow tube, then detach the chain from the flush handle arm. Snap the new flapper onto the same pegs and attach the chain, leaving about half an inch of slack - too much slack causes incomplete flushing, too little keeps the flapper from sealing. Turn the water back on, let the tank fill, and repeat the dye test to confirm the fix.
Adjust or replace the float
If the dye test cleared the flapper but water still runs, check the float. On ball-float designs, gently bend the float arm downward so the water shuts off about one inch below the top of the overflow tube. On cup-float designs (the more common modern style), pinch the adjustment clip and slide the float down the fill valve shaft. Flush and observe whether the tank now fills to the correct level and stops.
Replace the fill valve if problems persist
If adjusting the float does not stop the running, the fill valve itself may be worn. Shut off the water supply and flush. Use a sponge to remove remaining water from the tank. Place a bucket under the tank, then use pliers to disconnect the water supply line from the base of the tank. Unscrew the lock nut (turn counterclockwise) holding the fill valve in place, lift out the old valve, and install the new one according to the manufacturer's instructions. Reconnect the supply line, turn the water on, and test for proper filling and shutoff.
Test for a Leaking Flapper Easily
Drop a few drops of food coloring into the tank and wait 10-15 minutes without flushing. If color appears in the bowl, your flapper is leaking and needs replacement. This test costs nothing and pinpoints the problem before you buy any parts.
When to Call a Plumber
The repairs above resolve the overwhelming majority of running toilet cases. However, if you notice cracks in the porcelain, water pooling at the base of the toilet (which suggests a wax ring or supply line issue), or a flush valve seat that feels rough and pitted when you run your finger across it, it may be time to consult a licensed plumber. A damaged flush valve seat requires special tools to resurface or replace, and supply-line leaks near the wall shut-off valve can involve connections to the home's main plumbing.
When in doubt about any repair that involves connections beyond the tank itself, contacting a qualified plumber is always the safer choice. Most running toilet fixes, however, are firmly in DIY territory - and completing one successfully builds real confidence for future home repairs.
The content provided on our blog site traverses numerous categories, offering readers valuable and practical information. Readers can use the editorial team’s research and data to gain more insights into their topics of interest. However, they are requested not to treat the articles as conclusive. The website team cannot be held responsible for differences in data or inaccuracies found across other platforms. Please also note that the site might also miss out on various schemes and offers available that the readers may find more beneficial than the ones we cover.